Though conversion is quite a straightforward operation, its more advanced options does
require a bit of clarification / elaboration.
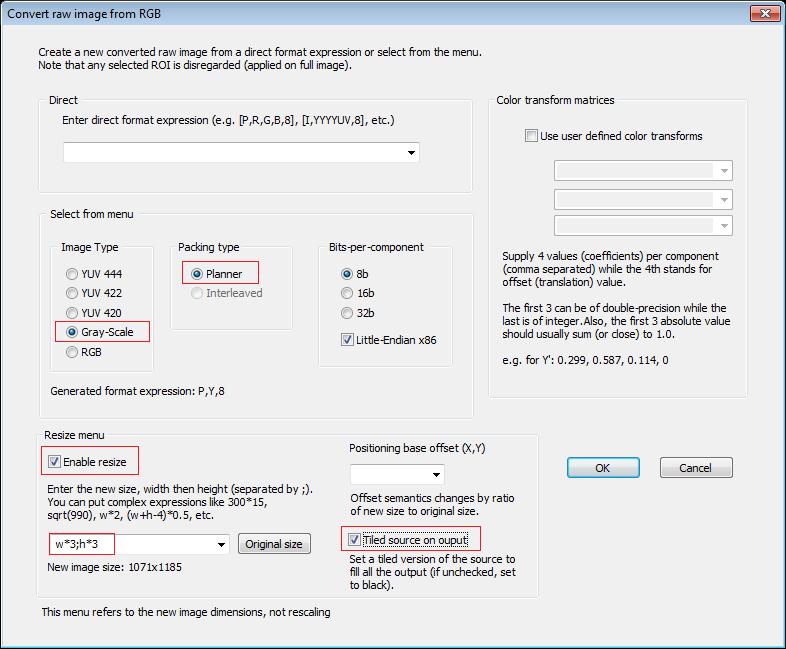
Use this dialog to convert your current RAW format to any (app supported) other format.
The “Select from menu” support roughly around 40 conversion types and it suits most
common needs but if you require a more fine-tuned conversion, use the “Direct” expression
to manipulate the output components / format as you wish, just follow the Formats file
syntax.
Example: Suppose you’re working with an embedded device that layout the YCbCr plane
with packed 422 in the form UYVY and 16bpp so as the menu doesn’t layout this option you
will write I,UYVY,16 (or -16) and that’s it.
The direct expression supports more than 200 RAW format styles (due to its flexible
component ordering scheme).
The color transform allows you to specify a specific flavor for your color space
conversion, else the app default is used. There’s not much to add here but that you should
know what you’re doing, a bit of mathematical / image analysis background will serve you
right here…
Resize menu options:
- Enable resize
When not enabled, the output will share the source image dimensions. - New size
Enter here the destination size. Note this is only image resizing, not any form of
scaling. Put the width and height in the form: width;height. For UX, you can put here
any kind of expression that the Image Evaluator can handle while ‘w‘ and ‘h‘ serve as
variables for the source width and height. This gives you the flexibility to work with
complex dimensions that have sophisticated ratios to the source image. If you use
expression like w*1.5;h*2 you’re assured this will work for all source dimensions and
not tailored to a specific image. - Positioning base offset
Enter here X,Y that have context-aware meaning:
– If the output will be larger than the source in both dimensions then this refers to
the offset in the output that the source positioning will start at.
– If the output is smaller (or partially smaller) than the source then this offset
refers to the start position in the source image that we’ll start taking pixels from.
Note that depending on the above explained context, you can use reverse indexing if it
suits you better (-1,-1 is the images source/output last pixel). - Tiled source on output
If set, then a repetitive pattern of the source image will be layout on the output,
yielding a tile effect (note that the base offset will have its regular affect here) so
this can be handy way to fill the entire output with the source pattern.
When not set, irrelevant sections on the output will be black (color-space depended). - Original size button
Helper button to set the source size in the new size edit box.
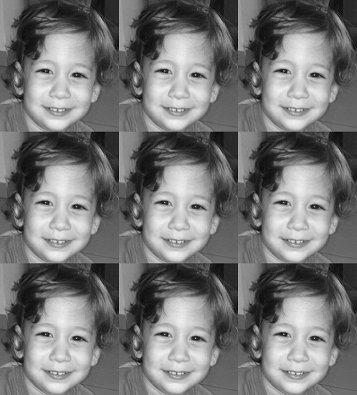
Example that shows how to take your “little prince” from a JPEG (RGB) image and by
taking the ROI of his face and then resizing and converting into gray-scale, you get
a passport like image (and 9 times your original prince…)